Wasatch SoftRIP General File Out driver
How to support more devices
The General File Out driver is used to output TIFF files, which can be used by printer interfaces that SoftRIP does not directly support. Because this driver can be used to create output for so many devices, the interface has a rich set of configuration options.
If you click on the Properties button next to the Printer Model menu on the Imaging Configuration screen, the following control panel for this printer will be displayed:
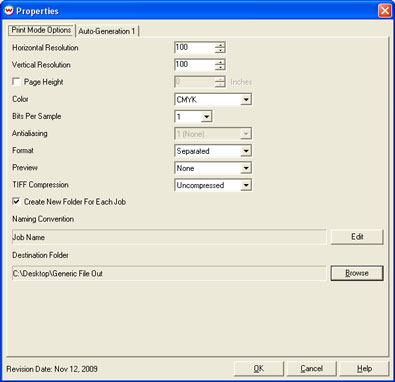
Select an output folder for the files by clicking Browse.
The Printer Properties window has several settings:
- Resolution: Sets the horizontal (scan) and vertical (feed) resolution.
- Color: Sets the type of color output of the device. Options are Monochrome, RGB, CMYK, CMYKLCLM, and Custom.
- Bits Per Sample: Select 1 for halftoned data, and 8 or 16 for contone data
- Antialiasing: For contone data, this sets the number of times the data is oversampled to prevent aliasing.
- Format: Select composite (all output in a single file) or separated (a single file is created for each channel).
- Preview: Select whether a preview is required, and the output format of the preview.
- TIFF Compression: Select the compression type of the output TIFF files, or select uncompressed.
- Create New Folder For Each Job: If enabled, this option will create a subdirectory of the destination folder for each job, and place the created files within it.
File Naming
To set how the output files will be named, click Edit. The following window will be displayed:
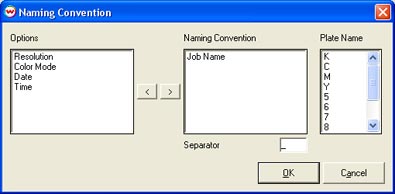
The order of each item under Naming Convention will be how the output files are named. Each item will be separated by the character in the Separator field. Click the right and left buttons to switch the options into or out of the naming convention.
When more than one file will be created in Separated Mode, the Plate Name will be appended to the rest of the naming convention. Double-click or right-click to change the value for each file.
Custom Inksets
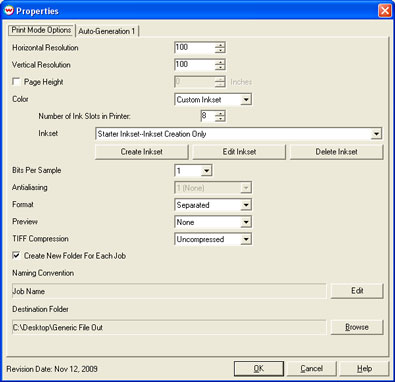
Selecting the Custom Inkset option from the Print Mode enables the ability to select custom inksets.
Auto-Generation Options
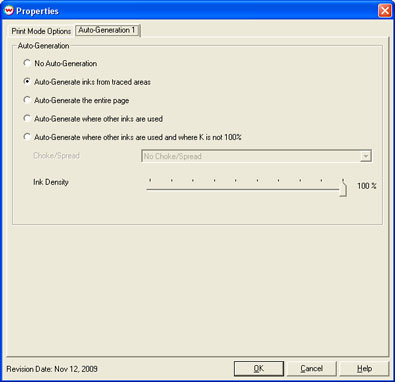
If your custom inkset includes an unmanaged channel, such as white or varnish, you will be able to turn on Auto-Generation options. The available options are:
- No Auto-Generation: Auto-Generation will be turned off. Only spot color replacements and incoming data from multichannel files will be sent to those output channels.
- Auto-Generate inks from traced areas: The unmanaged color will be applied to the area within the contour path defined in the Trace window.
- Auto-Generate the entire page: The unmanaged color will be applied to the entirety of the page for each image.
- Auto-Generate where other inks are used: The unmanaged color will be applied only to locations where the incoming data is not white. You can select a choke (withdraw the unmanaged color away from edges in the image) or spread (expand the unmanaged color over edges in the image).
- Auto-Generate where other inks are used and where K is not 100%: The unmanaged color will be applied only to locations where the incoming data is not white AND K is not 100%. You can select a choke (withdraw the unmanaged color away from edges in the image) or spread (expand the unmanaged color over edges in the image).